I am SO excited! my friend Christine started her own blog!!
You should all go check it out!!!
Synchroc's sewing!!

12 May 2012
Silly sewing sallies

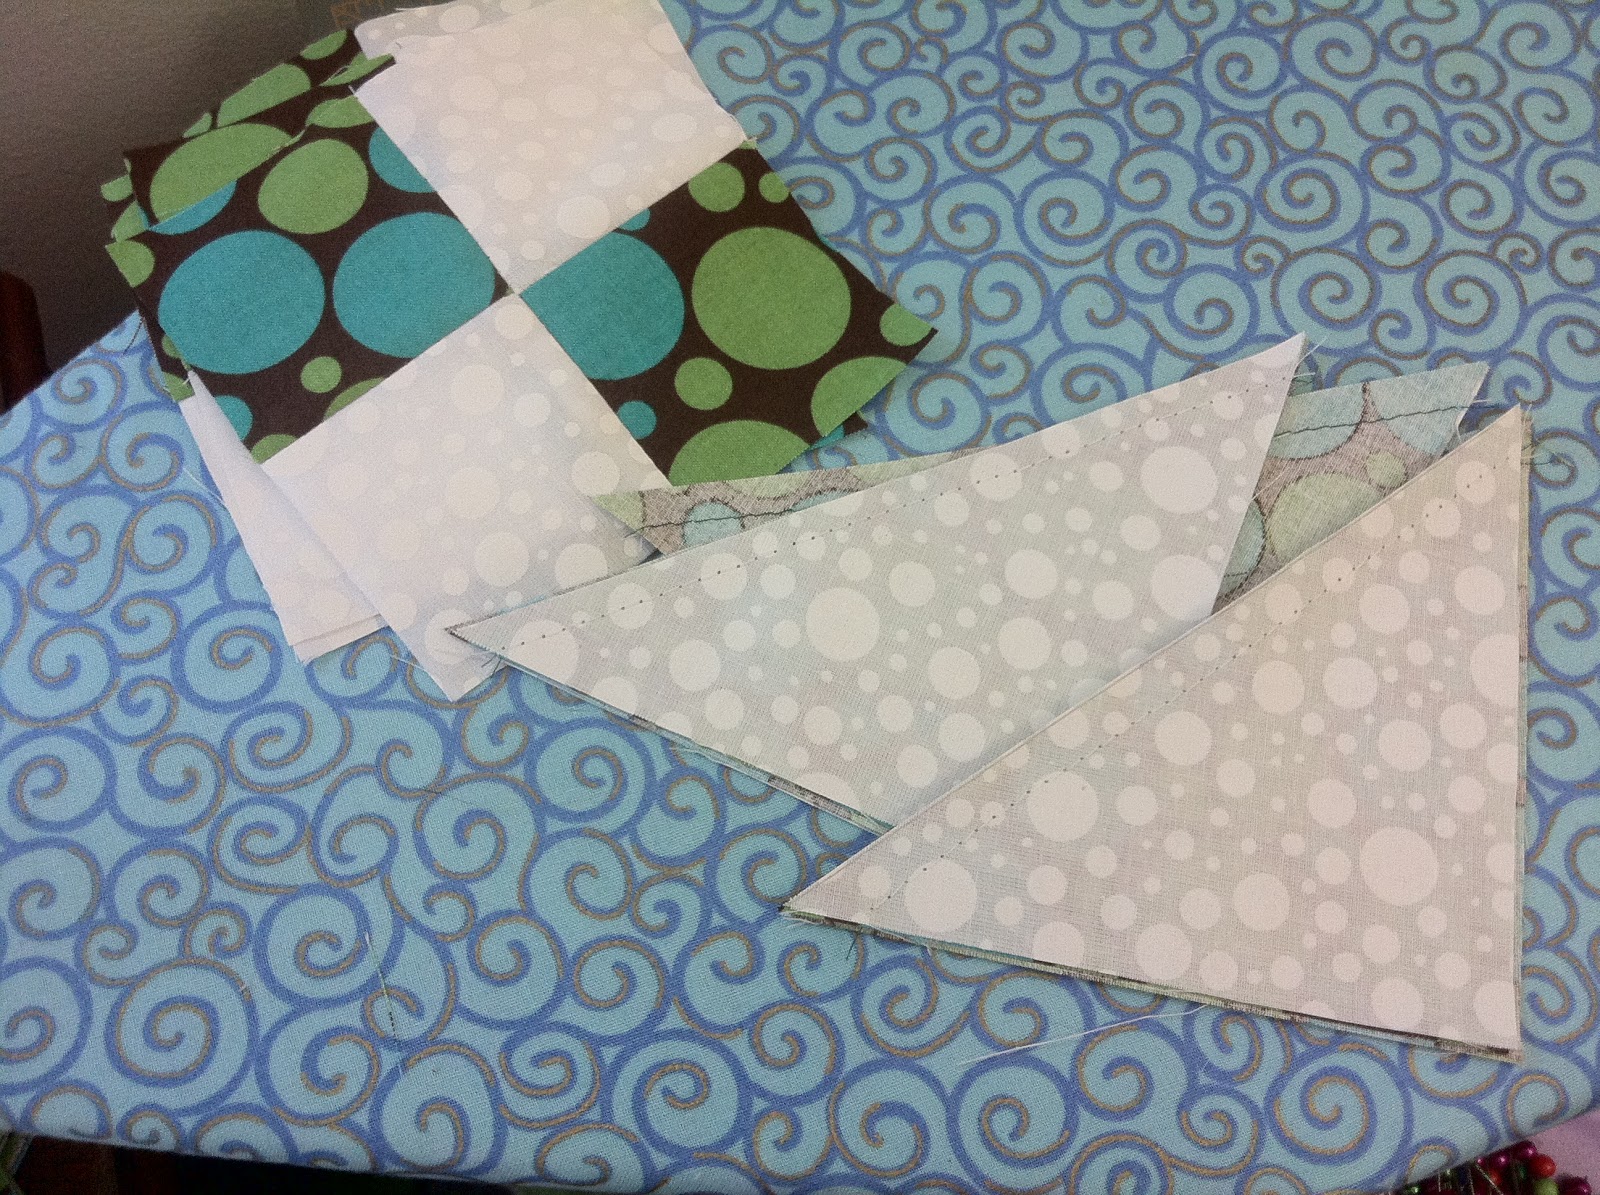
Christine got half done with her quilting. I finished 2 pillow cases and started on my block exchange!
10 May 2012
Sewing day!
Christine & I have been sewing today! Here's what we've gotten done!
Christine quilting her canvas for her bag.
The pillowcase for my sister! (I have also been organizing!)


Christine quilting her canvas for her bag.
The pillowcase for my sister! (I have also been organizing!)
09 May 2012
Jacobs ladder
I am a member of
 Which is a block exchange. you get a new partner each month, and you make a block for them, and they make a block for you. My first partner (april 2012) didn't specify which block, but what colors, her colors were "Greens
and teals, blacks, reds". I think I spent more time looking for fabrics than actually sewing! I had greens, but no teals. I had a few blacks, and a few reds, but nothing that really went together. Well finally I found the fabric that you will see. I thought they went together nicely!
Which is a block exchange. you get a new partner each month, and you make a block for them, and they make a block for you. My first partner (april 2012) didn't specify which block, but what colors, her colors were "Greens
and teals, blacks, reds". I think I spent more time looking for fabrics than actually sewing! I had greens, but no teals. I had a few blacks, and a few reds, but nothing that really went together. Well finally I found the fabric that you will see. I thought they went together nicely!
So the next thing I had to decide, was which block to do! I searched for blocks that were 12.5" (a requirement of the swap). I finally decided on a Jacobs ladder. And I LOVED it!! I have wanted to make one for a while, so I did!
I couldn't find any really good instructions on it, so I decided to write one up myself! This will I believe be my first FINISHED tutorial! I have started a few, but not finished them! (I need to quit being such a slacker!)

You need strips, ok you don't need strips, but I like to do strips. They are 4 7/8" and 2 1/2".

You cut them into squares, so this is the 4 7/8"

Here are the 4 7/8" squares

And the 2 1/2" squares

Take one light and one dark 4 7/8" square and draw a diagonal line from one corner to the other.

Then sew 1/4" seam on both sides of the line.

With your 2 1/2" squares sew them in twosies (sets of two, one light one dark)

Then sew the twosies together to make foursies.
Cut apart the 4 7/8" squares. And here are my foursies.

Press the HSTs open.

Lay it out (I would suggest doing this! I accidentally sewed one piece on wrong cause I wasn't paying attention to my lay out!)

and Voila! A finished Jacobs ladder block!
Tee shirt quilt side 1
So I finished my sisters tee-shirt quilt, but I hadn't gotten a picture of the backside, so I didn't want to post pictures of it, but it's been too long! I just need to get up what I can, and then take another picture next time I am in Iowa (or just start taking pictures before I ship things off!)

I didn't realize how fuzzy this picture was! I REALLY need to get a better picture now! What I did, was cut up the blocks, then put interfacing on the back. Then I added the sashing and corner stones. I decided on the front to use purple sashing with yellow corner stones and on the back yellow sashing with purple corner stones. (her school colors were purple & gold) as I was getting to the end of the back side I didn't have enough shirts. Well I found a few that would work, but as i was cleaning up something in my sewing room, guess what I found?! some more tee-shirts! I guess I will be making her some pillows ;)
I would definitely do some things differently next time. This time I made some blocks smaller, and some a little bigger, thinking the rows would end up being ok. But I had put this away for a few months, so I forgot which ones I had done that too! So the back ended up being a little wonky. And even here you can see that top row is slightly shorter than the row below it. I ended up just adding a little bit of fabric to it.

I of course needed help pinning the two layers together ;) I hope their puppy Bo didn't mind the cat hair :)
08 May 2012
Haiti Student & Teacher bags
Haiti Student School Bags and Haiti Teacher School Bags
I am a part of the Methodist church, and one of their projects this summer. My mother in law had a display and she asked me to make up some of these bags so that she could display them and what is in them. I was glad I was able to help. Last year I had done the pillowcase dresses, which I am hoping to make a few more this summer!
So here are some pictures of her display and the bags. If you want more information about the bags, then you can click this link that tells about it
 Here are the five bags I whipped up! (they really didn't take much time!) and I was able to use some upholstery fabric I have had for a while! I wanted to use more corduroy, but I couldn't find it! I really need to clean up my sewing room!
 And here is the display my MIL had put up!
The UMW of Indiana is also collecting supplies to put in the bag, which can also be found on the link that I posted.
I am a part of the Methodist church, and one of their projects this summer. My mother in law had a display and she asked me to make up some of these bags so that she could display them and what is in them. I was glad I was able to help. Last year I had done the pillowcase dresses, which I am hoping to make a few more this summer!
So here are some pictures of her display and the bags. If you want more information about the bags, then you can click this link that tells about it


The UMW of Indiana is also collecting supplies to put in the bag, which can also be found on the link that I posted.
Subscribe to:
Posts (Atom)